Another mostly healthy granola bar… yeah, I know. Boring. But, these were really, really good. And, I don’t want to forget the recipe. It’s super-simple and quick. They make a great small meal or a hearty snack.
Peanut Butter Granola Bars
makes 1 8×8 square dish
2 cups quick cooking oats, pulsed in a food processor for three seconds
1/3 cup AP flour
1 cup sugar
1 cup peanut butter, chunky (I prefer honey-roasted)
1 jumbo egg
1 teaspoon vanilla extract
1/2 teaspoon sea salt, finely ground
Preheat oven to 350 degrees.
Combine dry ingredients. Add remaining ingredients and stir to combine. The mixture will be dry and crumbly. Butter an 8×8 baking dish. Add the crumbly dough and spread it evenly around the baking dish. Press it firmly into the baking dish to create an even layer of dough.
Bake at 350 degrees for 30-35 minutes. Cool completely. Then, cut into small squares.
To turn this into a sweet treat: Add 1 cup white chocolate chips.
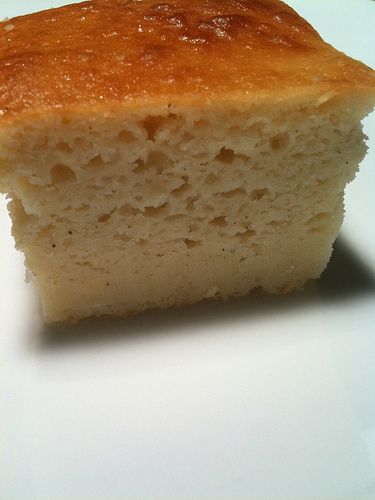
Scott Peacock made corn muffins on Martha Stewart’s show this Monday. Given it’s similarity to an Italian polenta cake, it was a recipe I had to make immediately. But, of course, I had to add my own little touches of Italy. So, his buttermilk corn muffins become my savory polenta cake.
Savory Polenta Cake
(Adapted from Scott Peacock’s Corn Muffin recipe)
1 1/2 cups corn meal, finely ground
1/4 cup granulated sugar (my addition)
1/2 teaspoon baking soda (originally 3/4 tsp)
1/2 teaspoon sea salt, finely ground (originally 1 tsp)
2 1/4 cups buttermilk
2 eggs
2 Tablespoons olive oil (originally 2 Tbsp melted butter)
Preheat oven to 375 degrees. (Originally 425 — to make muffins)
In a large bowl, combine dry ingredients and stir vigorously. Make a large well in the center and add the remaining ingredients. Using a fork, briefly whip the eggs into the milk and oil. Then, gently stir in the dry mixture. Stir briefly; only stir long enough to combine the ingredients.
Butter one 8×8 inch baking tin. Pour batter into baking tin. Bake for 40-45 minutes. Serve warm.
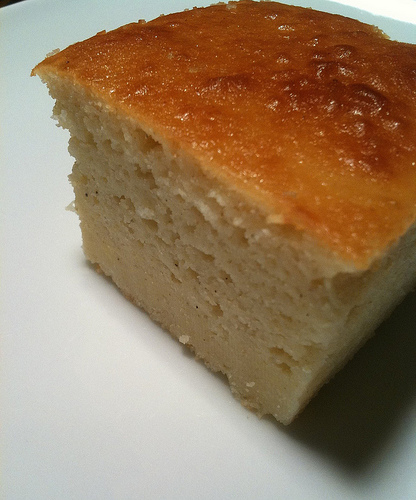
Sadly, these pictures were taken on the second day. As you can see, this is best on the day of baking. Over time, the bottom compresses and becomes quite dense. No worries, though, you’ll want to eat a piece with every meal. Chances are good that it’ll never make it to the second day.

Deep Dark Red Climbing Roses
This gorgeous rosebush is covered in blooms… dozens and dozens of blooms. Now, if only I knew the variety… Munstead Wood (Ausbernard)? Maybe.
Garden Update
Added:
2 Additional Artichoke (Now 8 total)
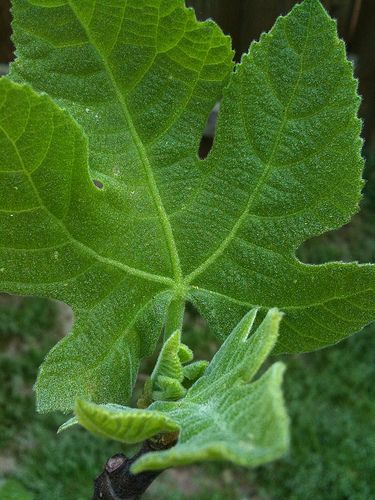
1 Celeste Fig Tree (Higo Celeste)
10 Sparkler Radish
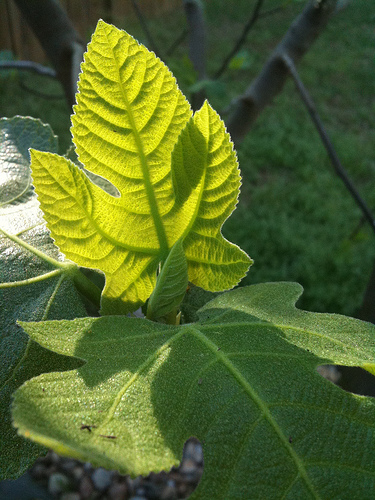
Our Green Giant (A huge brown turkey fig tree)
This week’s Garden Additions:
3 Black Mission Fig Trees
6 Artichoke Sprouts
10 Heirloom Cherry Tomato Plants (assorted varieties)
And, this weekend, we’ll be adding 12 (or more) of each:
Italian Red of Florence Bunching Onions
Basil
Dill
Carrot Assortment
Easter Egg Radish Assortment
Gourmet Beet Assortment
Lemon Cucumbers
Previous Additions:
Miraculously, everything is thriving. All rosemary, peppers, rhubarb, oregano, chamomile, blackberry bush and blueberry bush are growing extremely fast. Both lavender plants are very healthy, but, growing slowly as expected. My Kentucky Derby Rose is making a downright miraculous recovery from near-death. And, my unknown variety of deep dark red climbing roses is stunningly beautiful and starting to bloom. I need to take pictures when the countless buds bloom. I hope I remember!
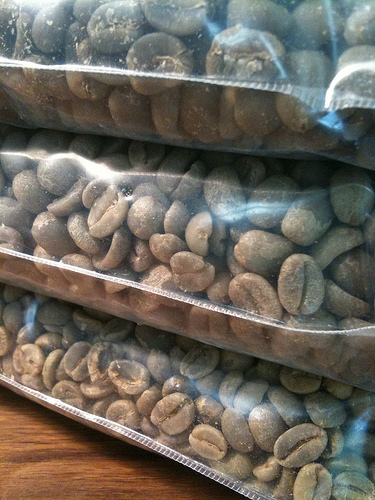
I first purchased green coffee about 7 years ago. While looking for a source of high quality chicory, I found Sweet Maria’s. Sweet Maria’s offers dozens of green coffees from around the world (not to mention the top quality chicory I was looking for). I placed my order for green coffee and chicory that same day. I didn’t have a roaster or French Press pot. But, we had both before our order arrived a few days later. And, we’ve never looked back.
There are a number of ways to roast green coffee. But, I’ve had great success with popcorn poppers. So, why mess with success? We’ve actually experimented with two different poppers. We have an air popper and a vintage popper with a automated stirring rod. The air popper is the quickiest method. And, it produces a surprisingly even roast. The electric popper with automated stirring rod takes longer to roast and produces a slightly less uniform roast. (We experiment with this method at least once with every new type of coffee we try. Sometimes, an uneven roast adds complexity in flavor.)
An air popper can be purchased for less than $20 and it’s quicker than most dedicated roasters. If you’re brewing one or two pots a day, this economical option is the smart way to go. But, for safety reasons, it needs constant monitoring.
Roasting Green Coffee (Air-Popper Method)
*Note* Only side-vented poppers can be used!!
(For an illustration of the proper type of popper, click here.)
2/3-3/4 cup green coffee
Use the same amount of coffee that the manufacturer recommends. (If the manufacturer recommends 2/3 cup of popcorn, substitute 2/3 cup of coffee. This will aid even roasting.) Place a large bowl under the popper hood to catch the fibers (or chaff). Pour in your green coffee beans and turn on your popper. Roast green coffee from 4-6 minutes. For safety reasons, monitor your roasting beans at all times! And, be prepared to turn off your popper at all times. If beans begin to burn, turn off your popper immediately. For an in-depth description of the air-popper method, go here.
When beans are roasted to your preference, pour them onto a metal sheet pan (or large rectangular wire colander) and shake the pan. Beans should be cooled quickly in a single layer with plenty of space between the beans. This stops the roasting process.
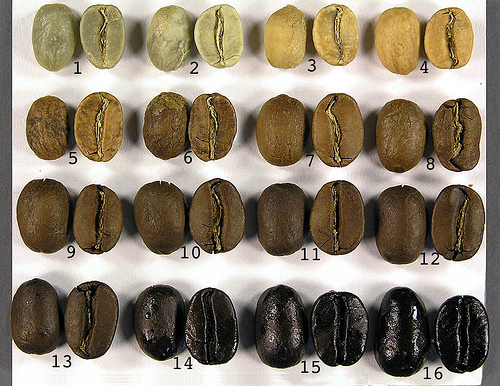
For more information on this Coffee Roasting Scale, visit Sweet Maria’s Coffee Pictorial
Sweet Maria’s Coffee Pictorial Roasting Guide goes into great detail to describe each specific level of roasting including the internal temperature of the bean. This information is priceless. Using this scale, we prefer our coffee to be roasted somewhere between 10 and 13… depending on the type of coffee being roasted.
This week we’re roasting:
Mmmm… this is a good week.
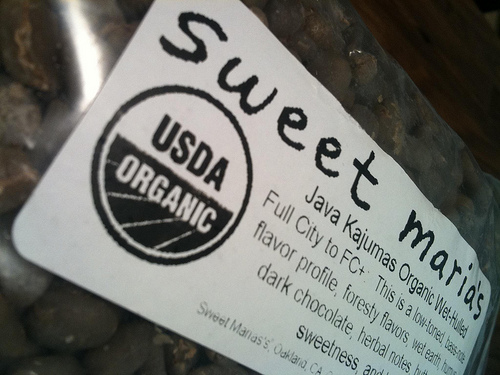
Sweet Maria’s
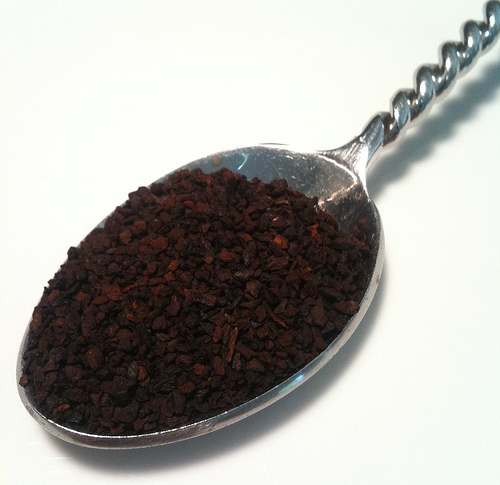
Roasted Chicory
Used as a coffee additive or substitute, chicory is inexpensive and caffeine free. It adds a distinctive roasted flavor with a rich full body. When used in moderation, it makes a pleasantly mellow cup of coffee. If used in excess, the sour characteristics become unbearable for me.
Chicory Coffee
2 parts of your favorite French roasted coffee, freshly ground
1 part roasted chicory
Combine coffee and chicory in a small bowl. Stir to combine.
Prepare in the same method as you would your favorite cup of coffee.
(I prefer the French Press method.)
Source:
Sweet Maria’s
Kevin Pang of the Chicago Tribune recently asked what Anthony Bourdain would do… if he were given control of the Food Network. His response? “I’d bring back “Molto Mario” right away. I’d have Mario Batali do a standard instructional show that would be the cornerstone. I would make it more chef-centric, of course. I would make sure Sandra Lee was never allowed near any cooking utensil or food item. Immediately. I’d have a long talk with Rachael Ray. I’d say, “Look, Rachael, you’re bigger than food now. You’re in Oprah territory. You don’t have to cook anymore. Move on.”
I’d give Ina Garten more time, because I think her food’s good. I might try to do some Asian, Latino and be more inclusive, with cultural culinary programming. They also used to have a great show called “My Country, My Kitchen.” And of course they canceled it because it was so excellent. That’s a show I’d bring back.”
This should happen… now. Check out the full Q&A article at the Chicago Tribune here.
But, I’d like to make an addition. From midnight to dawn, they should broadcast back to back episodes of every food program that includes Julia Child and Jacques Pepin.
(And, for information on Anthony Bourdain’s show on the Travel Channel… go here.)
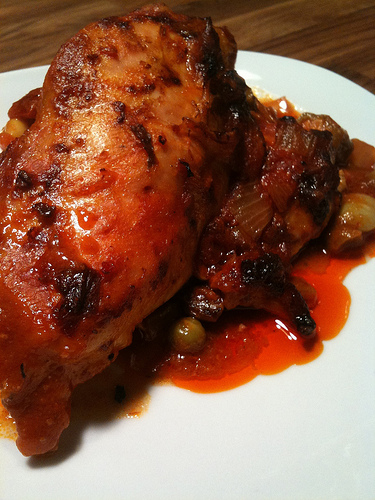
The addition of peas to this dish is a family traditional. My grandmother always added them. So, we honor her tradition. She was a gardener… not a hunter. Growing up, I probably ate this dish 2-3 times a month. Fresh peas in the summer… frozen or canned the rest of the time. (Canned… only in the most dire of circumstances) Needless to say, the dish was always better in the summer.
I’m usually frugal with fat. But, it really does add flavor. I’ve chosen to use skinless chicken breasts. Without a generous dose of olive oil, this dish would be horribly bland and boring. The spicy red tinted olive oil is divine sopped up with a piece of crisp, rustic bread. I think it’s my favorite part of the whole dish.
Pollo alla Cacciatora
4 skinless bone-in chicken breasts (or one whole chicken)
1/4 cup olive oil (more or less)
2 onions, diced
1-2 cloves garlic, finely diced
3 roasted red peppers, diced with seeds and skin removed
1 20 oz can Sclafani tomatoes (crushed or whole)
1 wine glass of white wine
1 teaspoon black pepper, freshly ground
1 teaspoon crushed red pepper
salt, to taste
2 cups baby peas (fresh or frozen)
Preheat oven to 375 degrees.
In a large dutch oven, saute onions to a light golden. Add garlic. Saute for an additional minute or two. Add all of the remaining ingredients, except the chicken and peas. Bring sauce to a vigorous simmer. Set chicken breast on top of the sauce, spacing them evenly in the pot. Place in preheated oven and bake for 35 minutes.
Remove 1 cup of sauce. Place it in a small baking dish, with 2 cups of peas. Add salt and pepper, to taste. Place in the oven to bake as the chicken finishes. (Approximately 10-15 minutes)
Mangia! Mangia!
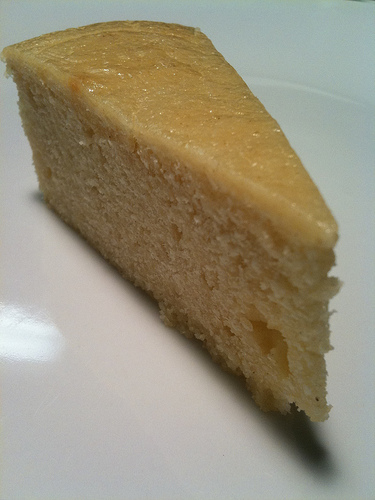
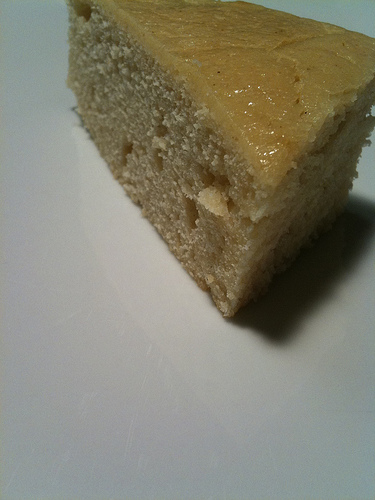
This mildly sweet treat works as a small breakfast, snack or light dessert. Not too plain… not too sweet. And, I love the delicate crumbly texture.
Sweet Almond Polenta Cake
makes one 8 x 8″ square
1 cups AP flour
3/4 cup polenta, fine
1/2 cup blanched almonds, finely ground
1 teaspoon baking powder
1/2 teaspoon sea salt, very fine
1 cup superfine sugar
1 cup buttermilk
2 eggs
1/4 cup olive oil (light & fruity)
1 teaspoon vanilla extract
1/2 teaspoon almond extract
Preheat oven to 350 degrees.
Combine dry ingredients. Stir vigorously to aerate. Form a well in the center. Add remaining ingredients. Stir briefly and gently until all ingredients are combined.
Butter one 8 x 8 inch square cake pan. Spread batter evenly over the cake pan.
Bake at 350 degrees for 45 minutes.
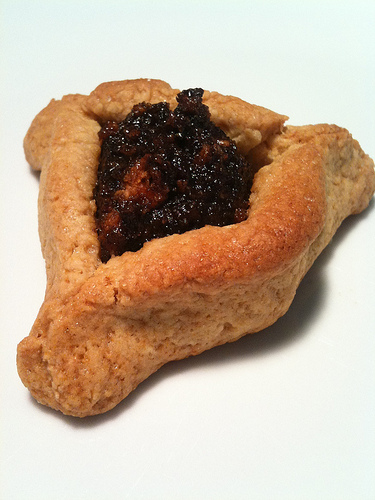
I’m not happy with the cookie portion. I want a more tender, crumbly cookie to wrap around this yummy currant filling. I think next time I’ll use a mildly sweet sugar cookie recipe.
Dried Currant Paste
makes 3 cups of filling
2 cups dried currants
1/4 cup granulated sugar
1/2 tsp cinnamon
1 cup water
1 cup cookie crumbs (I used amaretti cookie crumbs)
Place all ingredients (except cookie crumbs) in a small sauce pan and simmer for 5-10 minutes. Let cool for 30 minutes. When cool, use a food processor to puree to a smooth paste. Place paste in a small bowl and add cookie crumbs. Stir to combine. Refrigerate.
Use small spoonfuls of paste to fill your cookie of choice. Bake according to your cookie recipe guidelines. (Add additional time, if needed.)
|
|